I have a theory (uh oh)...
So, here in Texas I perform with a local cast in Houston, and sometimes get to guest perform in Dallas and Austin. I write a monthly newsletter that I take wherever I'm going. I was researching some stuff for my April issue - which has both Tim Curry and Sue Blane's birthdays in it.
I was trying to tie it together a bit. Tim Curry and Sue's costumes. I wanted to mention the jacket. I had heard something about him getting it from a biker in London, but I couldn't find any sources to back that up. So I asked around and got some fabulous insights!
Apparently Tim bought the jacket from Malcolm McLaren's shop "Let It Rock". According to Wiki, he sold "clothing (dead stock, military surplus) and objects he'd sourced. When the shop became a success, he enlisted the help of his then-girlfriend Vivienne Westwood who customized and repaired original clothing and made facsimiles." Tim said the jacket came from a dead biker. Which honestly, sounds like something Vivienne or Malcolm would have made up just to give the piece more provenance, but that's just my opinion.
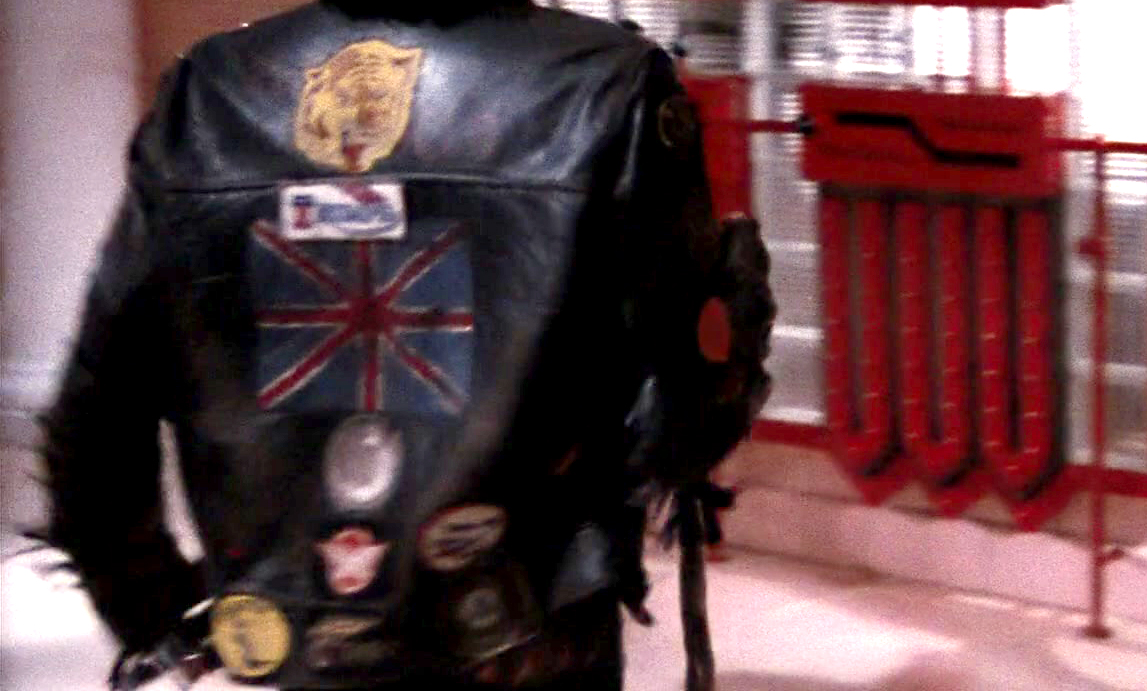
Okay, so here's what really got me thinking about the jacket. Doesn't it seem weird to have Ducati, BMW, Royal Enfield, Hells Angels, Nazi patches, etc... all on the same jacket? It's really all over the place. Street bikes.. racing bikes... nazi shit.... When you look at other Teddy Boy jackets, they don't quite look like this.
But here's my theory. The jacket probably came in partially adorned... but I'd bet anything Vivienne (or maybe even Malcolm) threw a WHOLE lot more stuff on it. Maybe surplus pins they had... deadstock patches... just really decked it out with anything and everything. It's completely in line with the info from Wiki (quoted above) and Vivienne's early M.O. (and someone who maybe didn't know a lot about Motorcycles...)
Showing posts with label leather jacket. Show all posts
Guest Post: Frank's Patches by Brandon Sutrina
I find Frank's jacket to be one of the most iconic jackets in film. Others and myself have obsessed on every little detail. There's lots of confusion about what are the accurate patches for Frank's jacket. Let's do our best to clear it up.
If you are looking for patches, some of these pull up on eBay every now and then. Some have current productions available. You can also find fan made replicas at the following people. Tyler Garrett, Dave Spelling & others, and myself - Brandon Sutrina.
If you want to discuss the jacket, see reference/verification photos, etc feel free to DM me HERE
Patch: Tiger Head
Dimensions: 4" X 4"
Notes: The Tiger Head patch was made by Lewis Leathers with the first run made in the 60's. There is a later production of the patch in which the orange has more of a red tint. Lewis Leather's also started reproducing the patch in 2021. This is a motorcycle patch for Triumph Tiger motorcycles.
Photo: Dave Spelling
59 Club Patches and Pins
Click here to visit their website.
Individual membership is £18.00
The 8 cm patch is the one you want (about 3-5/32") for £5.00 (a little over $6.00).
The pins are £5.50
Frank's Badges (Placement)
This list was made by Steve M. and has been in my Flickr folder for years... just needed to migrate it over to my blog. I have a separate blog entry detailing each badge with individual pictures.
| Frank's Right Side | Frank's Left Side |
| 1. Panther 2. Norton 3. BSA 4. BMW 5. "Here For The Beer" 6. Checkered Flag 7. Triumph 8. Outdoor Holiday Show 1971 Colex 9. Dresda Racing 10. 6-5 Rock n Roll Club Special 11. England Rose 12. Checkered Flag 13. Matchless 14. 1971 59 Club Motorcycle Shows 15. Unknown. (see blog entry) 16. CZ (medium blue) 17. Dresda Racing 18. Royal Enfield 19. 1969 BMFBrighton Show 20. Dresda Racing 21. Jawa 22. BMF 23. Silverstone 24. Isle of Man 25. Nurburgring (white middle) 26. Blue and white checkered Triumph 27. Master of Mallory 28. TriBSA 29. Norton (red) 30. 1971 BMF Olympia 31. 59 Club membership 32. Norton (black) 33. Think! 34. Checkered Flag 35. Blue & White Checkered Triumph |
1. Wimbledon 1972 2. Sunbeam 3. Checkered Flag 4. Petty Officer 2nd Class (under collar) 5. Butlin Clacton 1967 6. CZ (medium blue) 7. England Rose 8. Husquvarna 9. Jawa 10. Norton (black) 11. Concorde 12. 1966 Earl’s Court 59 Club Ally Pally 13. 1971 BMF Olympia 14. Scott (royal blue) 15. 6-5 Rock n Roll Club Special 16. Jawa 17. Triumph badge (blue) 18. Dresda Racing 19. Triumph Checkered Blue & White 20. Jawa 21. Jolly Roger 22. Red Café Biker (light blue) 23. 1968 Stanford Hall Rally 24. UK Hells Angels 25. Boy scout badge (fleur de lis) 26. Colex 1971 27. Ton Up Kid 28. Triumph 29. Oval Union Jack Checkered Flag 30. Matchless 31. The Vincent 32. Black Jaguar 33. Matchless 34. Fulham Anglers Club 35. Husqvarna 36. 1971 59 Club Motorcycle Shows 37. CZ badge 38. Triumph Checkered Blue & White 39. Checkered Flag 40. Norton (red) 41. England Rose 42. Dresda Racing |
More Patches On The Way!
Really excited to have a new embroidery machine, new software, and the ability to explore new design methods! Some patches have been ever-so-slightly resized. I pretty much make all the patches on Frank's jacket except for the 3 that are easy enough to find on eBay (Sylvester, Roadrunner, and Triumph).
The Mick Rock photos are some of the best references next to the film. You get a really good look at Frank's left arm in the film, but only a couple glimpses of his right arm. Not sure how the patches were attached to his jacket - but you can tell in some of the Mick Rock photos they are barely hanging on. If the patches had an iron-on or adhesive backing they may not have sufficiently adhered to the leather.
That 'mystery' patch on the back? I'm still leaning towards an adhesive residue or damage from a patch peeling off. You can see plenty of details in the rest of the patches while that one is just devoid - you can even see the white dot in the middle of the "Club Rock-n-Roll" patch, so if there were letters or graphic details on the 'mystery' patch they would be visible in 4k resolution by now.
There are some great adhesives these days, but the best way of attaching patches is to stitch them down - and you'll probably need to take it to a shoe doctor who can do it with a post machine - it's a machine designed specifically to reach tight places and can sew through leather with no problems.
The Mick Rock photos are some of the best references next to the film. You get a really good look at Frank's left arm in the film, but only a couple glimpses of his right arm. Not sure how the patches were attached to his jacket - but you can tell in some of the Mick Rock photos they are barely hanging on. If the patches had an iron-on or adhesive backing they may not have sufficiently adhered to the leather.
That 'mystery' patch on the back? I'm still leaning towards an adhesive residue or damage from a patch peeling off. You can see plenty of details in the rest of the patches while that one is just devoid - you can even see the white dot in the middle of the "Club Rock-n-Roll" patch, so if there were letters or graphic details on the 'mystery' patch they would be visible in 4k resolution by now.
There are some great adhesives these days, but the best way of attaching patches is to stitch them down - and you'll probably need to take it to a shoe doctor who can do it with a post machine - it's a machine designed specifically to reach tight places and can sew through leather with no problems.
Frank's Badges (Research)
![]() |
| Click for larger image. |
The Mick Rock book has some fabulous photos of Tim's jacket if you want to view an original source. The photos provided here are to the best of my knowledge, and notation is made where needed. Often there are very similar badges available.
The.Bajman on eBay has most of the easy to find badges as well as some of the patches. Andy Davies also recommends the-ton-up.com but says they sell out quickly. If you're searching on eBay remember to look on the UK site as well (http://ebay.co.uk) and search for "badge" instead of "pin".
|
Badge: Hell's Angels Quantity: 1 Placement: Middle of left breast, towards the sleeve. Procurement: Not too difficult, but if you're looking on eBay the auctions are often taken down. Make a note of the seller's name so you can contact them if that happens. |
|
| Badge: Fulham Anglers Club Quantity: 1 Placement: Lower-middle of left breast. Procurement: Difficult. Replicas available. Photo: Jeff Baker |
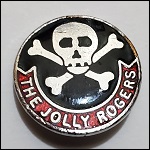
| Badge: The Jolly Rogers Quantity: 1 Placement: Middle left breast, about an inch below the collar Procurement: Harder to find correct 3/4" size Photo: Brandon |
|
| Badge: Wimbledon Speedway 1972 Quantity: 1 Placement: Left Shoulder. Procurement: A bit difficult, but the 1973 badge is nearly identical and much easier to find. |
|
| Badge: Here For The Beer Quantity: 1 Placement: Upper right side. Procurement: Easy. |
Hand Embroidered Frank Patches (Tutorial)
This tutorial was submitted by Chris Froehler. I think his results are amazing and it's a very affordable way to make your Frank costume stand out!
Materials:
Felt
Patience
A Pen
Fusible Interfacing
Regular Thread
Sulky Holoshimmer Thread
Patience
An Embroidey Hoop
Sewing Needles
And Patience..
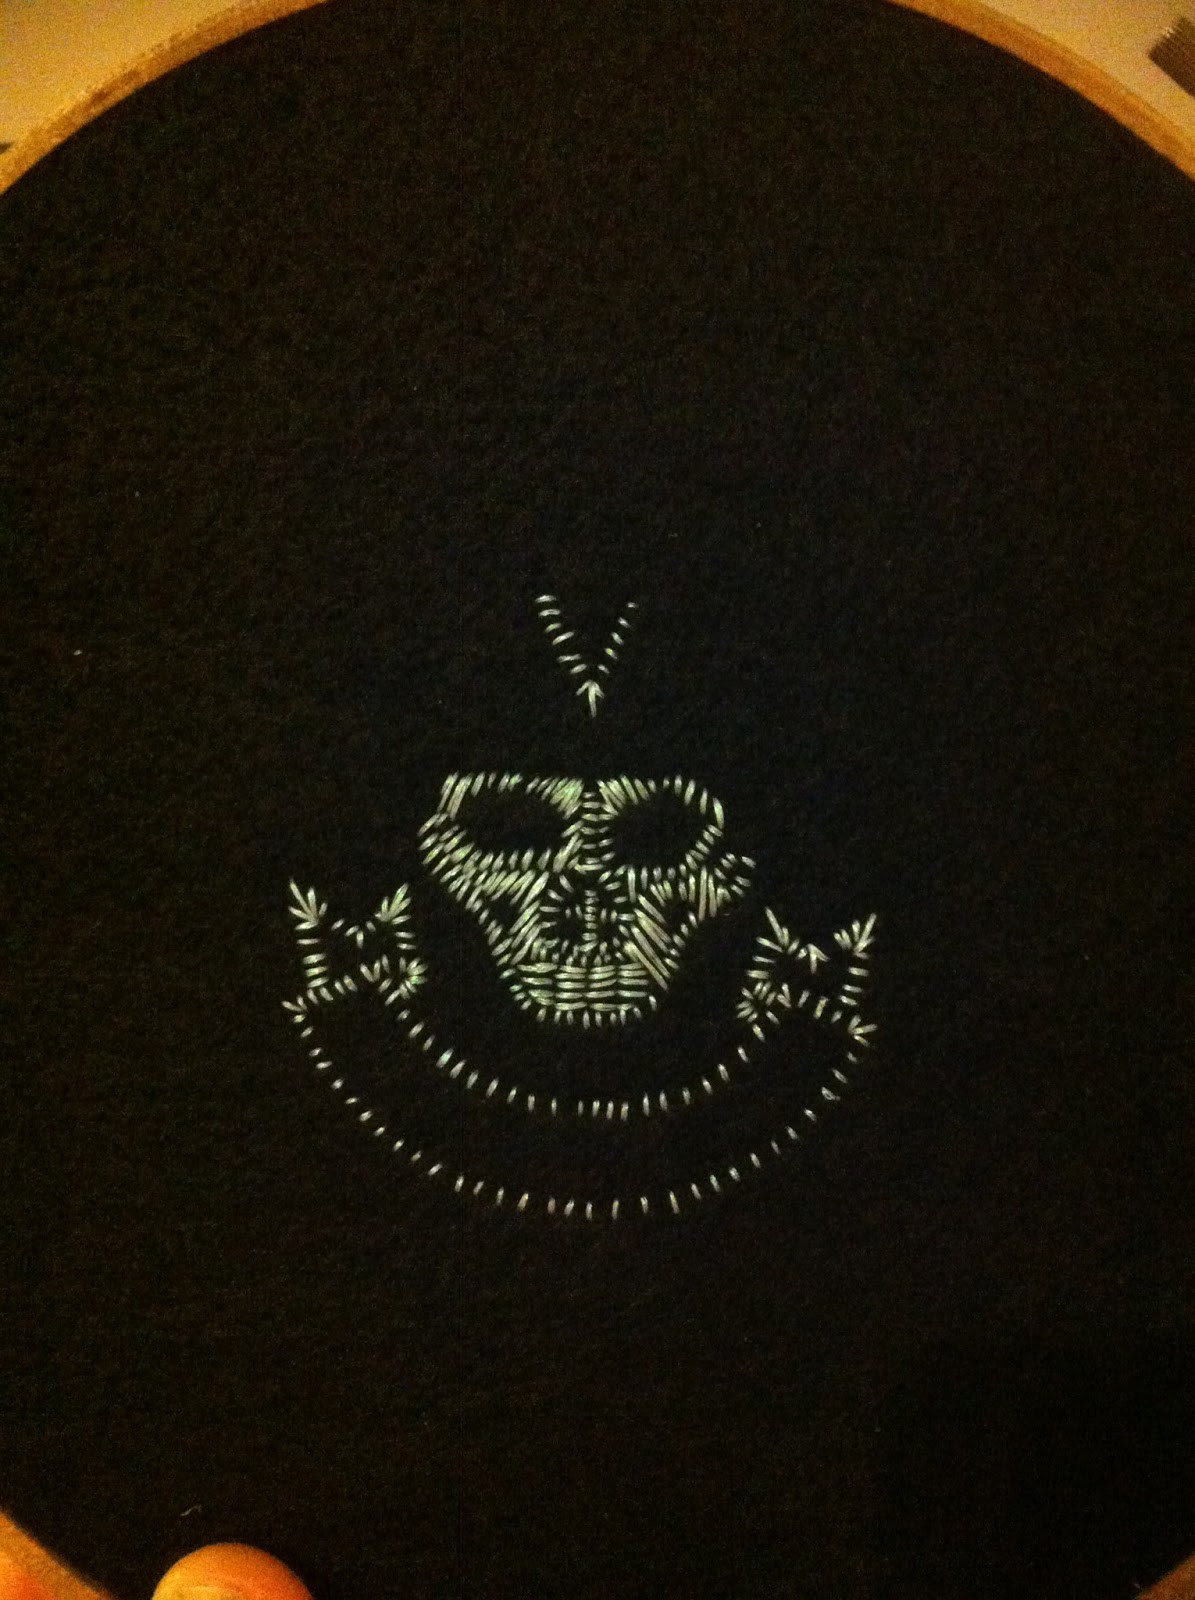
Begin by finding, or taking a picture of the patch you would like to reproduce.. I'll be making a Hell's Angels patch. You'll need to resize it, and create a mirror image of it to trace onto your iron on interfacing. (Be sure to trace the image before applying the interfacing to the felt.)
After you have applied the interfacing, place the material in the embroidery hoop. Being sure to get all of the slack out of the material.
Now we come to the part some of you might find intimidating.. But don't! :) It's a lot easier than you might think. You'll want to begin working with the interfacing facing you, so you have the traced image to use as a reference. Start by passing the needle through the felt on one of the lines of your sketch, and bring it back through on another. It's as easy as working with a coloring book! Make several parallel passes keeping your stitches about 1/8" apart until you have the body of the image finished, and turn the hoop over.
You should now have a rough image to use as a guide.
Using the same technique, but now using your stitches, and a photo of the patch as a reference, begin to add stitches between the ones from the first pass. Once that is done, repeat the process until you have finished working with that color thread and move onto the next one!
If you have any questions, don't hesitate to ask! Be sure to find me on Facebook and share your projects with me. :)
Tips on working with the Sulky metallic, and Holoshimmer thread...
This "thread" is actually a very thin, ribbon-like strip of polyester film. When threading a needle (I like to double up when using this thread) be sure to keep the film flat. If it gets twisted, it doesn't reflect the light very well. After passing the thread through the eye of the needle, hold the needle in one hand. With your thumb and fore-finger, pinch the thread and slide down the length to remove any twists and turns that might have occurred while drawing the thread off of the spool.. Tie the thread 2 or 3 times to make a knot large enough to prevent it from being pulled straight through the fabric. Pass the needle through the fabric. When you pass the needle back through, keep your finger or thumb under the stitch, so you can be sure the thread lays flat against the fabric for optimal reflection.
Materials:Felt
Patience
A Pen
Fusible Interfacing
Regular Thread
Sulky Holoshimmer Thread
Patience
An Embroidey Hoop
Sewing Needles
And Patience..
Begin by finding, or taking a picture of the patch you would like to reproduce.. I'll be making a Hell's Angels patch. You'll need to resize it, and create a mirror image of it to trace onto your iron on interfacing. (Be sure to trace the image before applying the interfacing to the felt.)
After you have applied the interfacing, place the material in the embroidery hoop. Being sure to get all of the slack out of the material.Now we come to the part some of you might find intimidating.. But don't! :) It's a lot easier than you might think. You'll want to begin working with the interfacing facing you, so you have the traced image to use as a reference. Start by passing the needle through the felt on one of the lines of your sketch, and bring it back through on another. It's as easy as working with a coloring book! Make several parallel passes keeping your stitches about 1/8" apart until you have the body of the image finished, and turn the hoop over.
You should now have a rough image to use as a guide.
Using the same technique, but now using your stitches, and a photo of the patch as a reference, begin to add stitches between the ones from the first pass. Once that is done, repeat the process until you have finished working with that color thread and move onto the next one!
If you have any questions, don't hesitate to ask! Be sure to find me on Facebook and share your projects with me. :)
Tips on working with the Sulky metallic, and Holoshimmer thread...
This "thread" is actually a very thin, ribbon-like strip of polyester film. When threading a needle (I like to double up when using this thread) be sure to keep the film flat. If it gets twisted, it doesn't reflect the light very well. After passing the thread through the eye of the needle, hold the needle in one hand. With your thumb and fore-finger, pinch the thread and slide down the length to remove any twists and turns that might have occurred while drawing the thread off of the spool.. Tie the thread 2 or 3 times to make a knot large enough to prevent it from being pulled straight through the fabric. Pass the needle through the fabric. When you pass the needle back through, keep your finger or thumb under the stitch, so you can be sure the thread lays flat against the fabric for optimal reflection.
DIY Motorcycle Badges
Inspired by Patti who made me some awesome jewelry, I just had to play with the stuff. This is not the Shrinky Dinks your parents played with! You can print your own designs off an ink-jet printer - and here's the best part; this shit is hard to break. It shrinks to 1/3 it's size, but becomes 9 times thicker.
So here's my first go - the 1971 Motorcycle Shows 59 Club badge. I've never come across it on eBay so I'm gonna say it's kinda rare. I couldn't get a great photo of one, so I downloaded a photo off the internet and cleaned it up in Photoshop. The font isn't a perfect match, but you can be pickier if you want. My image is 2.25" across - and you need to lighten the image about 50% before printing. It gets darker when it shrinks. A lot darker. Just follow the instructions and you'll be fine.
I had the best results with the printed side down, between two sheets of brown-bag paper. Less curling and it didn't affect the image. It took about 3 minutes in a toaster oven (yeah, I bought one just for this).
Here's what makes the biggest difference: embossing powder. It adds another layer of clear, shiny plastic. Once your Shrinky Dink is done shrinking, it's done. While it's still warm you can manipulate it a little - flatten it more if you need. But if you put it back in the oven it's not going to shrink any further.So once it's cooled off sprinkle the embossing powder (actually, it's tiny little plastic beads) all over it. Stick it back in the oven and just keep an eye on it. The beads will melt into one solid clear coat - maybe 30 seconds?
You can apply any pin-back style you like with some e-6000. I know you're thinking "but it's plastic, it's going to break" - but I wasn't able to break it, and it took my friend's husband some considerable effort. It'll look great from stage - and it's a great place-holder if you want to keep looking for an original.
Mao Badge
I had a handful of Mao badges made. If there's interest, I will order more. Ultimately, I'm hoping to have other badges reproduced. The reproductions won't be valuable like the originals, but I think people will feel a lot more comfortable wearing them on stage. Mao Badge eBay listing (8/17/2012)
The Chairman Mao badge doesn't actually appear in the film, though you can see it on Frank's jacket in the Mick Rock photos. I suspect it was removed because, as a large, flat object, it reflected the set lighting. That's my best guess. I doubt there were any political issues since he has a Nazi swastika on his sleeve.Still, it's a nice piece of Rocky trivia and something unique for the Frank who has "everything". Especially if you're looking to fill up your jacket.
Chairman Mao Zedung was a controversial 20th century figure. If you've ever wondered more about Warhol's piece, I found this on chinadaily.com.cn -
"Andy Warhol was in love with fame," said Gorvy. "At the moment in history, 1971-72, it was the reopening of China to the West. China was creating new relations with America. Nixon had gone over to China so Chairman Mao's image was everywhere and Warhol captured that. He understood ... that it was famous not just for that moment but famous forever."
The auction house said "Mao" constituted Warhol's first political portrait, successfully paving the way for a number of other political portraits and subjects including "Lenin" and "Hammer and Sickle."
"He chose Mao because he really was the most famous person in the world at that particular moment," said Gorvy.
Frank's Coat of Arms Badge
I know this is a really tiny detail, but I've invested a lot of time trying to figure it out so I'm going to share what I have so far.
The blue chevron is flanked by red chevrons. The charges look like a calligraphic "S" in the field area and 3 English rose charges on the chevron. It reads "Adoremus Dominum" across the bottom, but I can't make out the top at all.
Also, here are some of the symbols explained:
Adoremus Dominum - "Let us adore God"
Blue - Truth and loyalty
Chevron - Protection; Builders or others who have accomplished work of faithful service
Letter (S) - May represent great battles or tournaments beginning with that letter<
Red - Warrior or martyr; Military strength and magnanimity
Rose - Mark of the seventh son
The blue chevron is flanked by red chevrons. The charges look like a calligraphic "S" in the field area and 3 English rose charges on the chevron. It reads "Adoremus Dominum" across the bottom, but I can't make out the top at all.
Also, here are some of the symbols explained:
Adoremus Dominum - "Let us adore God"
Blue - Truth and loyalty
Chevron - Protection; Builders or others who have accomplished work of faithful service
Letter (S) - May represent great battles or tournaments beginning with that letter<
Red - Warrior or martyr; Military strength and magnanimity
Rose - Mark of the seventh son
Silver -
Peace and sincerity
Frank's Jacket Studs (Research)
I was flipping through my Mick Rock book today trying to study the stud layout on Frank's collar. There is an interesting photo on page 146 where his collar is flipped up and you can see the underside. I don't think those are regular metal jacket studs - they look like metal brads from an office supply store!! Anyone else see that, or am I going crazy?
Eagle (Nazi) Patches on Frank's Jacket
This is my replica of the Nazi patch on Frank's left sleeve, minus the swastika. The embroidered area is about 4" across. I used a metallic gold thread because most extant examples I've found online were metallic, despite Frank's looking dingy and matte (it would have been at least 30 years old during filming).
The Eagle on the bottom of his Right sleeve may have been metallic silver. The example I found online says it's embroidered in silver even though it still looks like a dingy white (below). I've been using white and I've replaced the swastika with a skull, as there are examples of this design with a skull directly below the Swastika.
It's likely the skull & crossbones patch on his right sleeve is also of Nazi origin.
The Eagle on the bottom of his Right sleeve may have been metallic silver. The example I found online says it's embroidered in silver even though it still looks like a dingy white (below). I've been using white and I've replaced the swastika with a skull, as there are examples of this design with a skull directly below the Swastika.It's likely the skull & crossbones patch on his right sleeve is also of Nazi origin.
![]() |
| Nazi Eagle design with skull |
![]() |
| Original Nazi Luftwaffe patch, silver thread on black felt. |
Frank's Leather Jacket (Research)

This jacket style has been reproduced by the original manufacturer - Lewis Leathers - they are known for their red quilted lining. Look for the Plainsman, Style #393. The fringe will need to be removed from the front and back (as Frank''s was).I have detailed the list of patches below (to the best of my knowledge, though I always welcome additional info). As for the mystery patch below the flag. I personally believe this is where a patch used to be and either left behind a residue or damaged the leather. If you study the Mick Rock photos, you can tell several of the patches are partially peeling off the sleeves. With the detail of the BluRay on a 4k screen there is still only a blurry smudge of a design when you can clearly see the adjacent patches in clear detail.
| Patch: Royal Enfield Placement: Top of left sleeve Details: Red and metallic gold. Black border. |
| Patch: 59 Placement: 2nd from top of left sleeve Details: Frank's looks silk-screened to me. You can buy an embroidered 59 patch for £5 if you join the 59 club (membership is £18/year). |
| Patch: Tri-BSA Placement: 3rd from top of left sleeve Details: Metallic gold, royal blue embroidery on black rectangle. |
| Patch: Triton Placement: 4th from top of left sleeve Details: Metallic gold thread, black felt circle |
picture
| Patch: Honda Placement: 2nd from bottom of left sleeve Details: |
Rock N Roll Patches In Stock!
I had these screen printed, and then they are edged in gold and trimmed with pinking sheers. They are a little more than 4" x 4" and they can be glued or stitched on. Limited qty. but if there is an interest I will have more made. Just click on the "For Sale" tab at the top of my webpage to purchase.
Frank's Leather Jacket
I finally have all the patches I'm able to make on my "Demo" jacket. Some probably aren't worth listing because you can still find them (and I did not make the Triumph on the back). Prices for the patches run $7.ºº to $11.ºº and I will discount on multiple orders. 8 more photos are in my Flickr account - check them out!
When I split the seams up the back of the sleeves to add the fringe, I was able to stitch on all the patches pretty easily. The leather for the fringe came off the sleeves of a converted Eddie jacket. The flag on the back (which I know is not screen accurate) is actually an iron-on printed off my home computer.
This jacket style has been reproduced by the original manufacturer - Lewis Leathers - they are known for their red quilted lining. Look for the Plainsman, Style #393. The fringe will need to be removed from the front and back (as Frank''s was).
When I split the seams up the back of the sleeves to add the fringe, I was able to stitch on all the patches pretty easily. The leather for the fringe came off the sleeves of a converted Eddie jacket. The flag on the back (which I know is not screen accurate) is actually an iron-on printed off my home computer.
This jacket style has been reproduced by the original manufacturer - Lewis Leathers - they are known for their red quilted lining. Look for the Plainsman, Style #393. The fringe will need to be removed from the front and back (as Frank''s was).
Tiger Patch for Frank Jacket
This is my final version of the Tiger patch embroidered on felt (100% polyester). It measures 5½" across by 5" vertical. The Triumph patch below the Tiger is still easy to find. The "Royal Enfield" lettering behind the tiger is just acrylic craft paint. The Union Jack flag is actually an iron-on that I printed off my computer.
I think the Tiger is probably related to Triumph motorcycles - who had a series of Tiger model bikes. I've seen similar Triumph designs that incorporate the Tiger over the Union Jack flag.
There are a couple quick opportunities to catch this patch in the film.
I think the Tiger is probably related to Triumph motorcycles - who had a series of Tiger model bikes. I've seen similar Triumph designs that incorporate the Tiger over the Union Jack flag.
There are a couple quick opportunities to catch this patch in the film.
Subscribe to:
Posts (Atom)


.jpg)