Showing posts with label guest post. Show all posts

Guest Post: A Seasonal Guide to Rocky Horror Costume and Prop Shopping by RM

When you’ve been involved in Rocky for decades, you notice it’s easier to find certain items during certain times of year and impossible to find them during other times. Seasons have a big influence on what colors of clothes, shoes, and accessories are sold in stores. For example, don’t go Janet costume shopping in the dead of winter! The same usually goes for yardage fabric and trims, although some colors and types are sold year-round. Here’s a simple calendar-based costume and prop shopping guide. It’s mainly based on the US/North American calendar—if you live somewhere else, your results may vary. Check out the post-holiday or post-season clearance sales to save money and stock up. If you’re looking for something out of season, your best bets are usually thrift stores or online shopping sites like eBay, etsy, or poshmark. Now you can get almost anything online, but remember: we’re cosplaying a movie from the 1970s! Styles go in and out of fashion, and some things will only look right if they’re custom-made or vintage. Also, be aware that metallic ribbons (for your Columbia shorts) that are meant for gift wrapping may not be very durable or washable—use at your own risk.

New Year’s Day (January 1):

  • Transylvanians (party hats, noisemakers, plastic champagne glasses)
  • Frank (party hats, plastic champagne glasses)
Lunar (Chinese) New Year (January or February)

  • Columbia (red and gold items like metallic ribbons)
Valentine’s Day (February 14)
  • All floorshow characters (lingerie like corsets, bustiers, sexy black underpants, garter belts; hosiery like fishnet pantyhose, fishnet thigh-highs, sheer thigh-highs)
  • Rocky (gold underpants)

Guest Post: Frank's Patches by Brandon Sutrina


I find Frank's jacket to be one of the most iconic jackets in film. Others and myself have obsessed on every little detail. There's lots of confusion about what are the accurate patches for Frank's jacket. Let's do our best to clear it up. 
If you are looking for patches, some of these pull up on eBay every now and then. Some have current productions available. You can also find fan made replicas at the following people. Tyler Garrett, Dave Spelling & others, and myself - Brandon Sutrina.
If you want to discuss the jacket, see reference/verification photos, etc feel free to DM me HERE


Patch: Tiger Head
Dimensions: 4" X 4"
Notes: The Tiger Head patch was made by Lewis Leathers with the first run made in the 60's. There is a later production of the patch in which the orange has more of a red tint. Lewis Leather's also started reproducing the patch in 2021. This is a motorcycle patch for Triumph Tiger motorcycles.
Photo: Dave Spelling


Guest Post: Quick & Dirty Rocky Wraps by RM

I came up with this solution for Rocky wraps that look good, are fairly easy and quick to put on and take off, and don’t immediately start unraveling as soon as they’re on. Believe it or not, I used 3-4 yards of white polyester interlock fabric left over from my Princess Leia costume. It’s a lightweight, drapey, slightly stretchy knit that stretches in both directions (not super-stretchy Lycra or the stiff double-knit polyester they used to make leisure suits from in the 1970s). I had no trouble sewing it on a normal sewing machine with a standard needle. The raw edge can run a bit, but it doesn’t fray like a woven fabric. I bought this in Asia, but I think the US equivalent would be “Jetset” from Jo-ann Fabrics or “polyester interlock” from the now-closed Hancock Fabrics.

For the leg wraps, you’ll also need about 2 yards of snap tape and about 2 yards of thin white cord.

Guest Post: Columbia Shorts by Russ

Super excited to feature a guest post by fellow costumer Russ.  Be sure to click on the photos to enlarge - they have an amazing amount of detail! This method will definitely bring your shorts to the next level whether you are making them from scratch or simply trying to modify something off the rack.

It is my belief that in looking closely at the Mick Rock photos, the method used for edging Columbia’s ribbons reveals itself: overlocking/serging. This conclusion was drawn by several factors: First, the edging cannot be a 100% solid in color, since in practically all reference photos, even the far edges of the ribbon shimmer at times. This lends the idea that the edges are stitched in some way; with windows between the stitches allowing the base of the lamé to shine through. A rolled hem doesn’t create the right shape or thickness. Folded edges using a ribbon folder or overlaying a satin-edged organza ribbon creates too solid of a line for my preference and again this method does not let the lamé shine through on the edges. Upon further examination, the Mick Rock photos indicate an edging that in my view can only be achieved through overlocking. Note how the edging looks sort of rough and slightly uneven (Fig.1).
The material used appears to be a woven/satin lamé/sometimes called ͞lurex͟. The same type of lamé was used on several costumes for the Transylvanians as well (in particular, some of their lapels), which lends to the idea that there was plenty of this material to use during the construction of the costumes for the film. To test this theory, I cut a 5/8͟ wide strip of satin lamé, backed with a black fusible interfacing for durability, and fed it twice through my overlocker (knife setting should be off). It was a perfect match to the Mick Rock pics: creating a two-toned look with little flecks of the lamé peeking through the edging. Here is an image of some sample gold ribbon compared to a photo in the Mick Rock book. The golds are an exact match. My ribbon looks out of proportion, since it is closer to the camera but it is 5/8͟ wide, which I believe to be an accurate width (Fig.2). Furthermore, with the interfacing fused and stitched in, no amount of tugging in any direction was budging the ribbon’s shape or integrity; which means these are going to
last for many years.

Covering A Columbia Hat (Alternate Method)

This is a guest post by RM - I was so impressed with her results! I think there's a little more work involved in this method, but the results speak for themselves. I have no doubt that this is the way Little Nell's was probably made because the sequin pattern on the bottom of the brim go straight back.  Also, Larry now has screen accurate gold sequin fabric for top hats and tail coats.

I started out with a plain black top hat and glued on layers of felt to make it flare out at the top, just like in Mina’s tutorial. Since I wasn’t happy with any of the gold sequin fabrics I found locally and there wasn’t time to order any, I decided to create my own wavy-line sequin fabric by tracing lines onto fabric with a cardboard template and gluing strings of sequin trim onto the fabric. (NOTE: Once I was finished, I decided the sequins weren’t close together enough so I added more sequin strings in the spaces between them.) I’m not sure how many yards of sequin trim it took—I just bought a spool of 100 meters and still have plenty left over. I chose a lightweight, semi-sheer cotton/silk lining fabric layered over a yellowish gold poly-cotton broadcloth, since that was the only way I could achieve the color and texture I wanted with the fabrics available.  I used my very most favorite glue, Gem-Tac. I made three large ovals (one for the flat top part of the hat, one for the underside of the brim, and one for the top side of the brim) and one long rectangle (for the stovepipe part of the hat). Be careful to make sure the nap of the sequins are all going in the same direction!


I glued the sequin fabric oval onto the top of the hat first, pinning it in place while the glue dried. You can see I made cuts through the center of the brim fabric pieces like a pizza—this is because on the top side of the brim, you need to wiggle that piece of fabric from the top of the hat (which is wider) down to the part where it meets the brim (which is narrower).

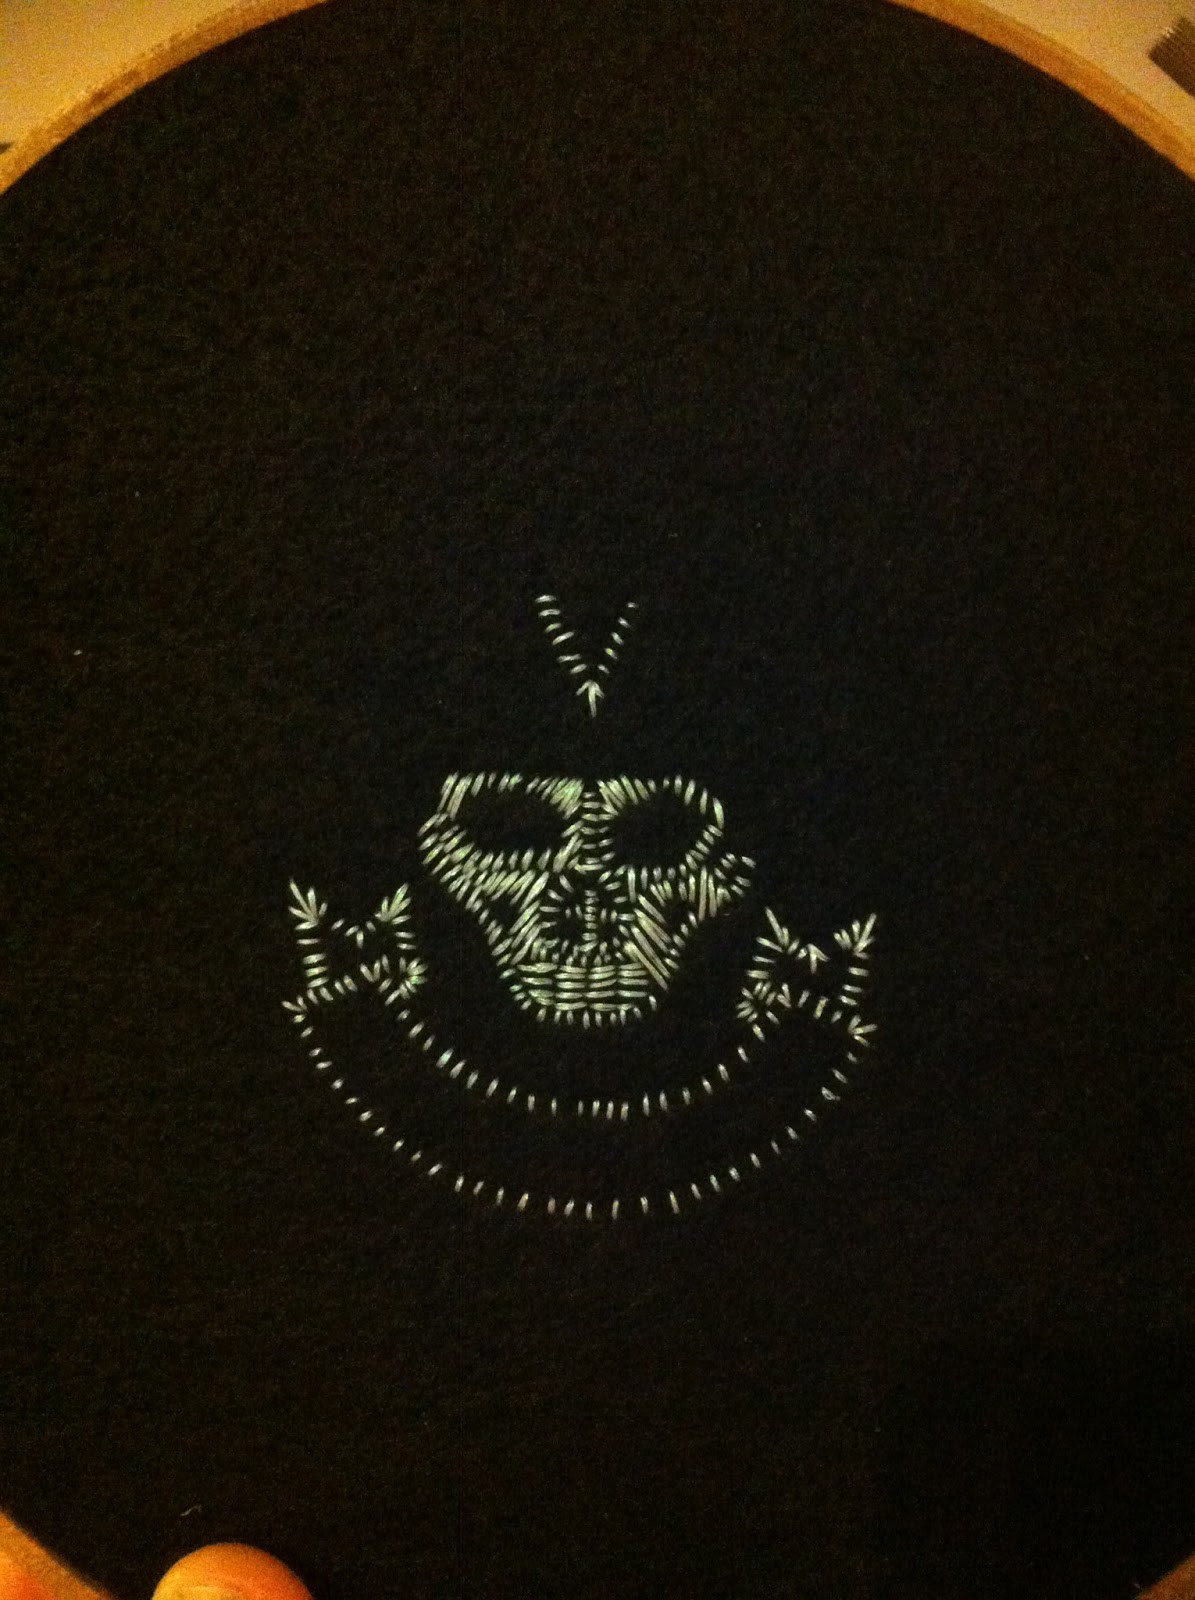
Hand Embroidered Frank Patches (Tutorial)

This tutorial was submitted by Chris Froehler.  I think his results are amazing and it's a very affordable way to make your Frank costume stand out!

Materials:
   Felt
   Patience
   A Pen
   Fusible Interfacing
   Regular Thread
   Sulky Holoshimmer Thread
   Patience
   An Embroidey Hoop
   Sewing Needles
   And Patience..

Begin by finding, or taking a picture of the patch you would like to reproduce.. I'll be making a Hell's Angels patch. You'll need to resize it, and create a mirror image of it to trace onto your iron on interfacing.  (Be sure to trace the image before applying the interfacing to the felt.)

After you have applied the interfacing, place the material in the embroidery hoop. Being sure to get all of the slack out of the material.

Now we come to the part some of you might find intimidating.. But don't! :) It's a lot easier than you might think. You'll want to begin working with the interfacing facing you, so you have the traced image to use as a reference. Start by passing the needle through the felt on one of the lines of your sketch, and bring it back through on another. It's as easy as working with a coloring book! Make several parallel passes keeping your stitches about 1/8" apart until you have the body of the image finished, and turn the hoop over. 
You should now have a rough image to use as a guide. 

Using the same technique, but now using your stitches, and a photo of the patch as a reference, begin to add stitches between the ones from the first pass.  Once that is done, repeat the process until you have finished working with that color thread and move onto the next one! 
If you have any questions, don't hesitate to ask!  Be sure to find me on Facebook and share your projects with me. :)

Tips on working with the Sulky metallic, and Holoshimmer thread...

This "thread" is actually a very thin, ribbon-like strip of polyester film.  When threading a needle (I like to double up when using this thread) be sure to keep the film flat. If it gets twisted, it doesn't reflect the light very well. After passing the thread through the eye of the needle, hold the needle in one hand. With your thumb and fore-finger, pinch the thread and slide down the length to remove any twists and turns that might have occurred while drawing the thread off of the spool.. Tie the thread 2 or 3 times to make a knot large enough to prevent it from being pulled straight through the fabric. Pass the needle through the fabric. When you pass the needle back through, keep your finger or thumb under the stitch, so you can be sure the thread lays flat against the fabric for optimal reflection.