Showing posts with label frank patch. Show all posts

Guest Post: Frank's Patches by Brandon Sutrina


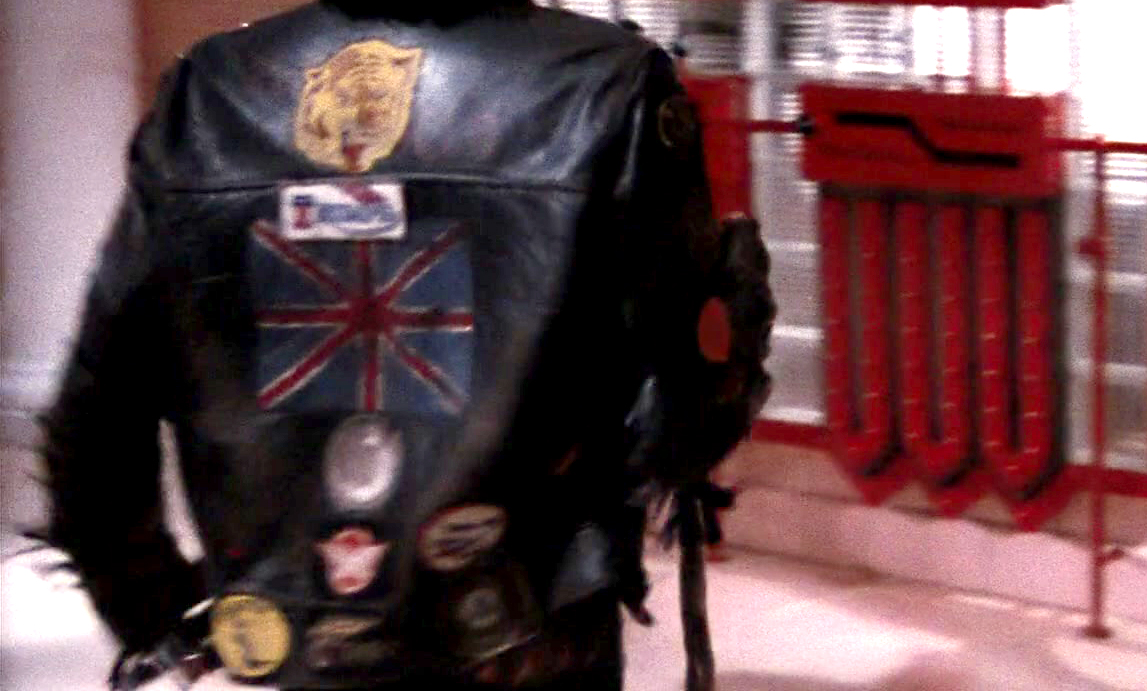
I find Frank's jacket to be one of the most iconic jackets in film. Others and myself have obsessed on every little detail. There's lots of confusion about what are the accurate patches for Frank's jacket. Let's do our best to clear it up. 
If you are looking for patches, some of these pull up on eBay every now and then. Some have current productions available. You can also find fan made replicas at the following people. Tyler Garrett, Dave Spelling & others, and myself - Brandon Sutrina.
If you want to discuss the jacket, see reference/verification photos, etc feel free to DM me HERE


Patch: Tiger Head
Dimensions: 4" X 4"
Notes: The Tiger Head patch was made by Lewis Leathers with the first run made in the 60's. There is a later production of the patch in which the orange has more of a red tint. Lewis Leather's also started reproducing the patch in 2021. This is a motorcycle patch for Triumph Tiger motorcycles.
Photo: Dave Spelling


59 Club Patches and Pins

59 Club patches and pins are supposed to only be worn by 59 Club members.  You don't have to own a motorcycle to become a member and membership is for life. Clive C. asks that the community please "get your 59 patches from the club only and help keep ones of the club's main sources of income flowing. The patches will be authentic as they have never changed the design."
Click here to visit their website.
Individual membership is  £18.00
The 8 cm patch is the one you want (about 3-5/32") for £5.00 (a little over $6.00).
The pins are £5.50


More Patches On The Way!

Really excited to have a new embroidery machine, new software, and the ability to explore new design methods!  Some patches have been ever-so-slightly resized.  I pretty much make all the patches on Frank's jacket except for the 3 that are easy enough to find on eBay (Sylvester, Roadrunner, and Triumph).

The Mick Rock photos are some of the best references next to the film.  You get a really good look at Frank's left arm in the film, but only a couple glimpses of his right arm.  Not sure how the patches were attached to his jacket - but you can tell in some of the Mick Rock photos they are barely hanging on. If the patches had an iron-on or adhesive backing they may not have sufficiently adhered to the leather.

That 'mystery' patch on the back?  I'm still leaning towards an adhesive residue or damage from a patch peeling off. You can see plenty of details in the rest of the patches while that one is just devoid - you can even see the white dot in the middle of the "Club Rock-n-Roll" patch, so if there were letters or graphic details on the 'mystery' patch they would be visible in 4k resolution by now.

There are some great adhesives these days, but the best way of attaching patches is to stitch them down - and you'll probably need to take it to a shoe doctor who can do it with a post machine - it's a machine designed specifically to reach tight places and can sew through leather with no problems.


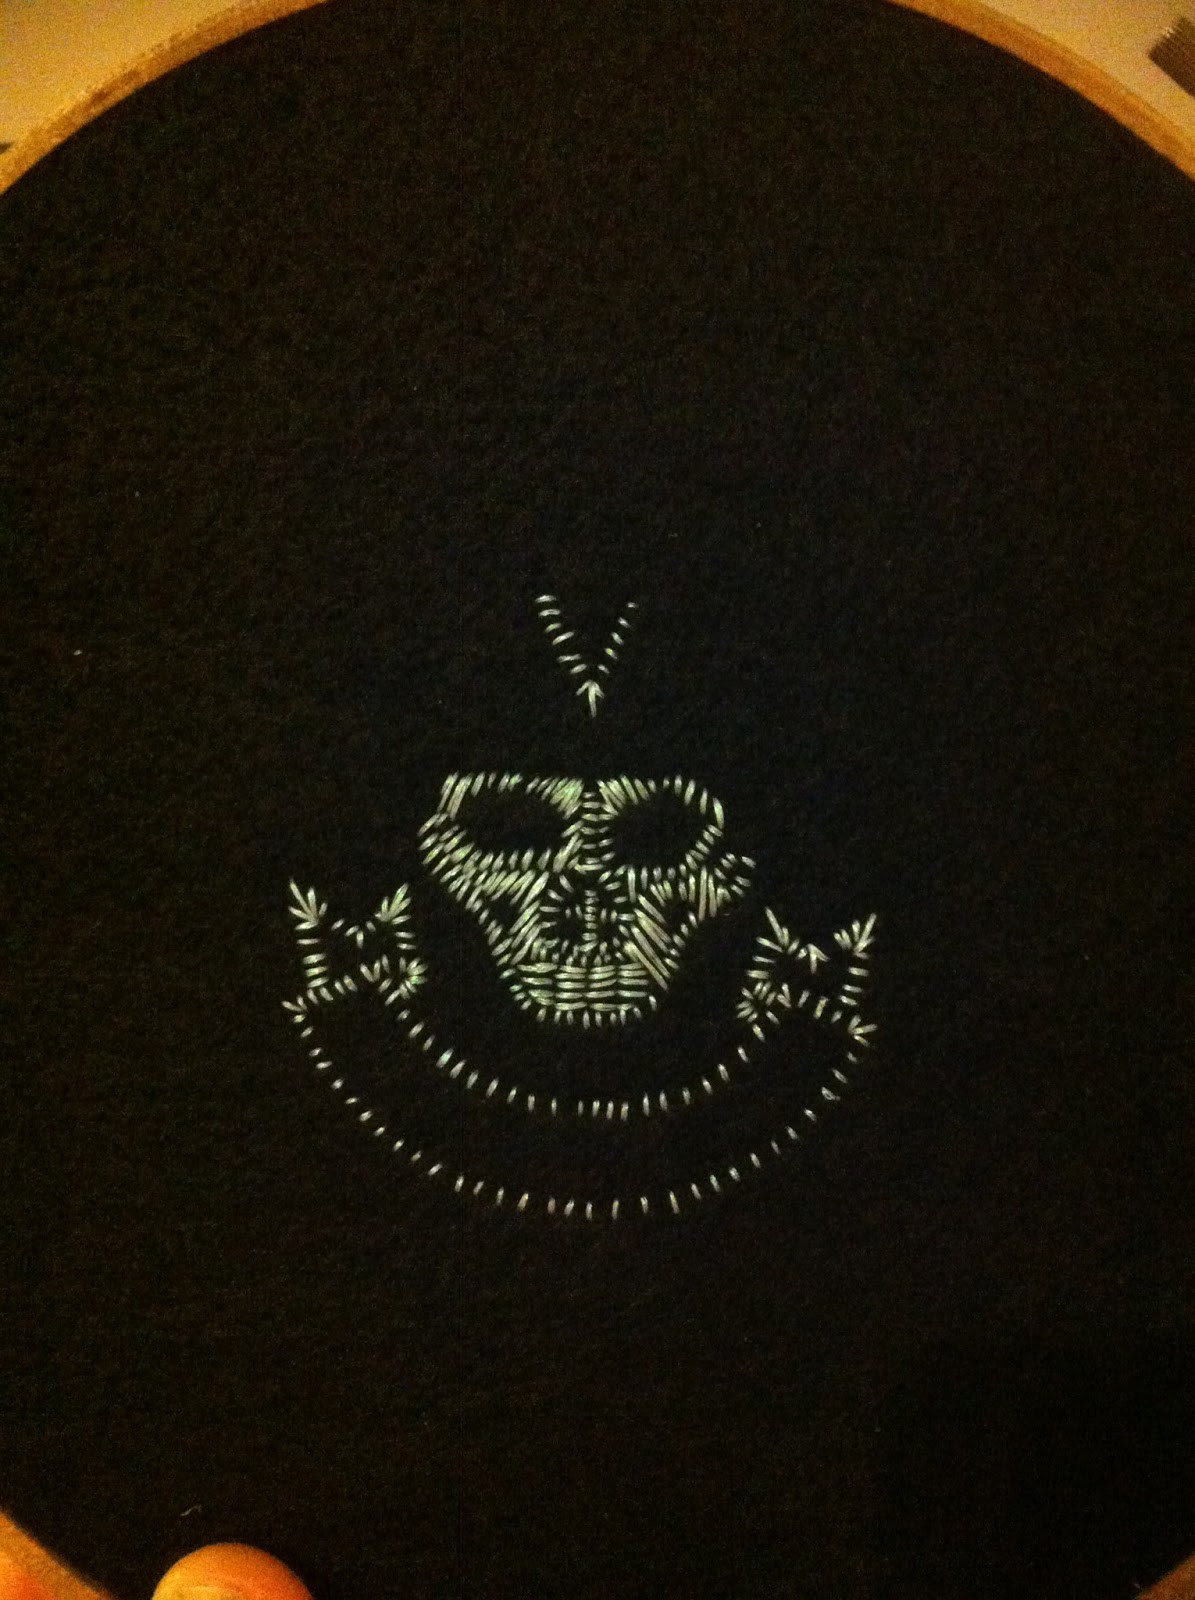
Hand Embroidered Frank Patches (Tutorial)

This tutorial was submitted by Chris Froehler.  I think his results are amazing and it's a very affordable way to make your Frank costume stand out!

Materials:
   Felt
   Patience
   A Pen
   Fusible Interfacing
   Regular Thread
   Sulky Holoshimmer Thread
   Patience
   An Embroidey Hoop
   Sewing Needles
   And Patience..

Begin by finding, or taking a picture of the patch you would like to reproduce.. I'll be making a Hell's Angels patch. You'll need to resize it, and create a mirror image of it to trace onto your iron on interfacing.  (Be sure to trace the image before applying the interfacing to the felt.)

After you have applied the interfacing, place the material in the embroidery hoop. Being sure to get all of the slack out of the material.

Now we come to the part some of you might find intimidating.. But don't! :) It's a lot easier than you might think. You'll want to begin working with the interfacing facing you, so you have the traced image to use as a reference. Start by passing the needle through the felt on one of the lines of your sketch, and bring it back through on another. It's as easy as working with a coloring book! Make several parallel passes keeping your stitches about 1/8" apart until you have the body of the image finished, and turn the hoop over. 
You should now have a rough image to use as a guide. 

Using the same technique, but now using your stitches, and a photo of the patch as a reference, begin to add stitches between the ones from the first pass.  Once that is done, repeat the process until you have finished working with that color thread and move onto the next one! 
If you have any questions, don't hesitate to ask!  Be sure to find me on Facebook and share your projects with me. :)

Tips on working with the Sulky metallic, and Holoshimmer thread...

This "thread" is actually a very thin, ribbon-like strip of polyester film.  When threading a needle (I like to double up when using this thread) be sure to keep the film flat. If it gets twisted, it doesn't reflect the light very well. After passing the thread through the eye of the needle, hold the needle in one hand. With your thumb and fore-finger, pinch the thread and slide down the length to remove any twists and turns that might have occurred while drawing the thread off of the spool.. Tie the thread 2 or 3 times to make a knot large enough to prevent it from being pulled straight through the fabric. Pass the needle through the fabric. When you pass the needle back through, keep your finger or thumb under the stitch, so you can be sure the thread lays flat against the fabric for optimal reflection. 

Eagle (Nazi) Patches on Frank's Jacket

This is my replica of the Nazi patch on Frank's left sleeve, minus the swastika. The embroidered area is about 4" across. I used a metallic gold thread because most extant examples I've found online were metallic, despite Frank's looking dingy and matte (it would have been at least 30 years old during filming).

The Eagle on the bottom of his Right sleeve may have been metallic silver. The example I found online says it's embroidered in silver even though it still looks like a dingy white (below).  I've been using white and I've replaced the swastika with a skull, as there are examples of this design with a skull directly below the Swastika.

It's likely the skull & crossbones patch on his right sleeve is also of Nazi origin.


Nazi Eagle design with skull
Original Nazi Luftwaffe patch,
silver thread on black felt.


Frank's Leather Jacket (Research)

These screen caps show off quite a few patches. I replicate many of these patches for sale. I offer a non-swastika version of the eagle on his left sleeve (contact me for purchase).

This jacket style has been reproduced by the original manufacturer - Lewis Leathers - they are known for their red quilted lining.  Look for the Plainsman, Style #393.  The fringe will need to be removed from the front and back (as Frank''s was).

I have detailed the list of patches below (to the best of my knowledge, though I always welcome additional info).  As for the mystery patch below the flag. I personally believe this is where a patch used to be and either left behind a residue or damaged the leather. If you study the Mick Rock photos, you can tell several of the patches are partially peeling off the sleeves. With the detail of the BluRay on a 4k screen there is still only a blurry smudge of a design when you can clearly see the adjacent patches in clear detail.


Patch: Royal Enfield
Placement: Top of left sleeve
Details: Red and metallic gold. Black border.

Patch: 59
Placement: 2nd from top of left sleeve
Details: Frank's looks silk-screened to me. You can buy an embroidered 59 patch for £5 if you join the 59 club (membership is £18/year).  

Patch: Tri-BSA
Placement: 3rd from top of left sleeve
Details: Metallic gold, royal blue embroidery on black rectangle.

Patch: Triton
Placement: 4th from top of left sleeve
Details: Metallic gold thread, black felt circle

picture

Patch: Honda
Placement: 2nd from bottom of left sleeve
Details: 

Rock N Roll Patches In Stock!

I had these screen printed, and then they are edged in gold and trimmed with pinking sheers. They are a little more than 4" x 4" and they can be glued or stitched on. Limited qty. but if there is an interest I will have more made. Just click on the "For Sale" tab at the top of my webpage to purchase.

Tiger Patch for Frank Jacket

This is my final version of the Tiger patch embroidered on felt (100% polyester). It measures 5½" across by 5" vertical. The Triumph patch below the Tiger is still easy to find. The "Royal Enfield" lettering behind the tiger is just acrylic craft paint. The Union Jack flag is actually an iron-on that I printed off my computer.

I think the Tiger is probably related to Triumph motorcycles - who had a series of Tiger model bikes. I've seen similar Triumph designs that incorporate the Tiger over the Union Jack flag.

There are a couple quick opportunities to catch this patch in the film.