Showing posts with label frank. Show all posts

Frank's Pearls

If only everything were so easy to be source! I've had some of these so long, I don't even know where I sourced them from. But here's what I can currently offer (as of July 2025):
  • 20mm White Pearls (20 beads needed for 16" necklace + 4" chain)
  • 20mm Silvery-Grey Pears (20 beads needed for 16" necklace + 4" chain)
  • 25mm White Pearls (15 beads needed for 16" necklace + 4" chain)
The options listed above will be $25 each (+ shipping) and include the allocated beads, spacer beads, clasp & chain, and jewelry wire. Additional beads for longer necklaces may cost slightly more.

I will continue to search for the stainless steel beads - the beads are easy enough to find; the problem is their holes are usually too large to use with spacer beads.

I will also continue to search for 22mm White Pearl beads, as I think that would be the ideal size.

I can count 14 on Frank (across the front and sides), and estimate there's probably another 5 (give or take) behind his neck. His chain gap is at least 2".


Frank's jacket JUST A THEORY

I have a theory (uh oh)...
So, here in Texas I perform with a local cast in Houston, and sometimes get to guest perform in Dallas and Austin. I write a monthly newsletter that I take wherever I'm going. I was researching some stuff for my April issue - which has both Tim Curry and Sue Blane's birthdays in it. 

I was trying to tie it together a bit. Tim Curry and Sue's costumes. I wanted to mention the jacket. I had heard something about him getting it from a biker in London, but I couldn't find any sources to back that up. So I asked around and got some fabulous insights!  

Apparently Tim bought the jacket from Malcolm McLaren's shop "Let It Rock". According to Wiki, he sold "clothing (dead stock, military surplus) and objects he'd sourced. When the shop became a success, he enlisted the help of his then-girlfriend Vivienne Westwood who customized and repaired original clothing and made facsimiles." Tim said the jacket came from a dead biker. Which honestly, sounds like something Vivienne or Malcolm would have made up just to give the piece more provenance, but that's just my opinion. 

Okay, so here's what really got me thinking about the jacket. Doesn't it seem weird to have Ducati, BMW, Royal Enfield, Hells Angels, Nazi patches, etc... all on the same jacket?  It's really all over the place.  Street bikes.. racing bikes... nazi shit....  When you look at other Teddy Boy jackets, they don't quite look like this

But here's my theory. The jacket probably came in partially adorned... but I'd bet anything Vivienne (or maybe even Malcolm) threw a WHOLE lot more stuff on it. Maybe surplus pins they had... deadstock patches... just really decked it out with anything and everything. It's completely in line with the info from Wiki (quoted above) and Vivienne's early M.O. (and someone who maybe didn't know a lot about Motorcycles...)  

Frank's Dinner Scene Boots

Oh boy, these are gonna be hard to find!  You're looking for a high heel, knee-high boot that laces up the back side of the leg. They also have a peep-toe (but you'll most likely have to create that yourself). It looks like part of the vamp is made of a shinier, patent leather - and then the rest is some sort of slightly-stretchy pleather. Most Franks just attach a different anklet to their boot so they don't have to fuss with it in their quick change before the dinner scene.


Frank's Sweet T Heels

D'Orsay (pronounced "door-say") is a style of heel where the sides are cutaway on the vamp. You can read more about its 19th century origins and history here

Terry de Havilland (aka the "Rock-n-Roll cobbler of the 70s") was an English shoe designer (1938 - 2019). You can read more about his amazing career here.

Frank's Sweet T shoes are D'Orsay style platform heels designed by Terry de Havilland. They feature a very small, triangular peep-toe opening that is hard to discern from the side view (like the red shoes below). 

The modern "Lena" line by Terry de Havilland is similar in many ways, but not an exact match. Most of the newer lines have a larger, curved toe opening (like the silver shoes below).

Newer D'Orsay styles
by Terry de Havilland
Vintage peep toe shoes
with a triangular opening

Mick Rock was on the set during the filming of Sweet Transvestite so there are a lot of photos taken directly on the set while filming. 


The lab shoes seem to be identical, except in solid black. The boots are also peep-toe. And the floorshow heels seem to have some slightly different shaping, but are also made by Terry de Havilland (see them here).

Frank's Robe/Kimono (Research)

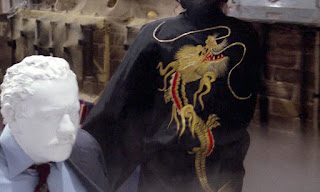
This style of robe (kimono) was fairly common in the '70s and you can still find a lot of similar designs even if they aren't identical. Frank's robe was probably silk (most were), and it has a red lining (which is also common). The dragon is red and gold, and there are some embroidered clouds on the front chest. 

I realize not every cast performs this scene, but I think it's hilarious when they do. Our cast used to have a mask with spackle to look like cold cream, and a wig with rollers tied up. Always got a nice reaction from the audience - although it helps if the other Floorshow performers are already on stage.


Frank's Floorshow Gauntlet (Research)

I was messaging with my friend Scott V. today about Frank's floorshow gauntlet and realized I never made a post about it. Definitely seems like the sequins were applied (in a continuous, meandering pattern) to the fabric before it was closed up. He also loses most of the feathers in the pool (but y'all know that). Not certain, but it looks like the split may be on the side of the wrist - or it could just be twisted. Never found a better view of that to confirm.

Click for full size image


Guest Post: Frank's Patches by Brandon Sutrina


I find Frank's jacket to be one of the most iconic jackets in film. Others and myself have obsessed on every little detail. There's lots of confusion about what are the accurate patches for Frank's jacket. Let's do our best to clear it up. 
If you are looking for patches, some of these pull up on eBay every now and then. Some have current productions available. You can also find fan made replicas at the following people. Tyler Garrett, Dave Spelling & others, and myself - Brandon Sutrina.
If you want to discuss the jacket, see reference/verification photos, etc feel free to DM me HERE


Patch: Tiger Head
Dimensions: 4" X 4"
Notes: The Tiger Head patch was made by Lewis Leathers with the first run made in the 60's. There is a later production of the patch in which the orange has more of a red tint. Lewis Leather's also started reproducing the patch in 2021. This is a motorcycle patch for Triumph Tiger motorcycles.
Photo: Dave Spelling


59 Club Patches and Pins

59 Club patches and pins are supposed to only be worn by 59 Club members.  You don't have to own a motorcycle to become a member and membership is for life. Clive C. asks that the community please "get your 59 patches from the club only and help keep ones of the club's main sources of income flowing. The patches will be authentic as they have never changed the design."
Click here to visit their website.
Individual membership is  £18.00
The 8 cm patch is the one you want (about 3-5/32") for £5.00 (a little over $6.00).
The pins are £5.50


Frank's Badges (Placement)


This list was made by Steve M. and has been in my Flickr folder for years...  just needed to migrate it over to my blog. I have a separate blog entry detailing each badge with individual pictures.

Frank's Right Side  Frank's Left Side 
1. Panther
2. Norton
3. BSA
4. BMW
5. "Here For The Beer"
6. Checkered Flag
7. Triumph
8. Outdoor Holiday Show 1971 Colex
9. Dresda Racing
10. 6-5 Rock n Roll Club Special
11. England Rose
12. Checkered Flag
13.  Matchless
14. 1971 59 Club Motorcycle Shows
15.  Unknown.  (see blog entry)
16. CZ (medium blue)
17. Dresda Racing
18. Royal Enfield
19. 1969 BMFBrighton Show
20. Dresda Racing
21. Jawa
22. BMF
23. Silverstone
24. Isle of Man
25. Nurburgring (white middle)
26. Blue and white checkered Triumph
27. Master of Mallory
28. TriBSA
29. Norton (red)
30. 1971 BMF Olympia
31. 59 Club membership
32. Norton  (black)
33. Think!
34. Checkered Flag
35. Blue & White Checkered Triumph


1. Wimbledon 1972
2. Sunbeam
3. Checkered Flag
4. Petty Officer 2nd Class (under collar)
5. Butlin Clacton 1967
6. CZ (medium blue)
7. England Rose
8. Husquvarna
9. Jawa
10. Norton (black)
11. Concorde
12. 1966 Earl’s Court 59 Club Ally Pally
13. 1971 BMF Olympia
14. Scott (royal blue)
15. 6-5 Rock n Roll Club Special
16. Jawa
17. Triumph badge (blue)
18. Dresda Racing
19. Triumph Checkered Blue & White
20. Jawa
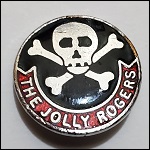
21. Jolly Roger
22. Red Café Biker (light blue)
23. 1968 Stanford Hall Rally
24. UK Hells Angels
25. Boy scout badge (fleur de lis)
26. Colex 1971
27. Ton Up Kid
28. Triumph
29. Oval Union Jack Checkered Flag
30. Matchless
31. The Vincent
32. Black Jaguar
33. Matchless
34. Fulham Anglers Club
35. Husqvarna
36. 1971 59 Club Motorcycle Shows
37. CZ badge
38. Triumph Checkered Blue & White
39. Checkered Flag
40. Norton (red)
41. England Rose
42. Dresda Racing 

More Patches On The Way!

Really excited to have a new embroidery machine, new software, and the ability to explore new design methods!  Some patches have been ever-so-slightly resized.  I pretty much make all the patches on Frank's jacket except for the 3 that are easy enough to find on eBay (Sylvester, Roadrunner, and Triumph).

The Mick Rock photos are some of the best references next to the film.  You get a really good look at Frank's left arm in the film, but only a couple glimpses of his right arm.  Not sure how the patches were attached to his jacket - but you can tell in some of the Mick Rock photos they are barely hanging on. If the patches had an iron-on or adhesive backing they may not have sufficiently adhered to the leather.

That 'mystery' patch on the back?  I'm still leaning towards an adhesive residue or damage from a patch peeling off. You can see plenty of details in the rest of the patches while that one is just devoid - you can even see the white dot in the middle of the "Club Rock-n-Roll" patch, so if there were letters or graphic details on the 'mystery' patch they would be visible in 4k resolution by now.

There are some great adhesives these days, but the best way of attaching patches is to stitch them down - and you'll probably need to take it to a shoe doctor who can do it with a post machine - it's a machine designed specifically to reach tight places and can sew through leather with no problems.


Frank's Cape

These are the results I got with modifying Simplicity's cape pattern #2499 (might be discontinued, but check eBay). I widened the center back panel so that I could accommodate the pleating.  It also widened the hem some.  My finished hem was just short of 18' - that's a big cape!!

I used Baroque Satin and silver lamé fabric.  The collar has an inner layer of fusible Pellon 71F Peltex.  I bag lined the entire cape - which means I sewed the sides and bottom with right sides together like a pillow case before attaching the collar.  The hem is completely closed in.

My preference is to not put a closure on the front, but if you're wearing it outside the show you can easily add a large hook and loop or tie strings.

Frank's Cape (Research Pt 2)

In trying to study more details of Frank's cape, I can't find evidence of a center back seam.  What I do see are some raglan seams on the front and back of both shoulders.  This would make it a 5 (or 7) piece cape instead of a 4-piece. But here are some screen caps of where I think I'm seeing the seams-


Simplicity's 2499 has a 7-piece cape with the raglan seams.  All you would need to do is widen the center back piece to have enough to pleat into the collar.  

Frank's Badges (Research)


Click for larger image.
There was no way to create this listing in one attempt, so there will be multiple updates/additions/corrections on this page.  It has been an amazing collaborative effort and the Rocky community has really come through.  Thanks to Andy Davies, Brandon Sutrina, Christopher Froehler, Steve Millikin, Ari Tress, Shawn Anthony, Jeff Baker, Mark Ferguson, and Herman Ceulemans.

The Mick Rock book has some fabulous photos of Tim's jacket if you want to view an original source.  The photos provided here are to the best of my knowledge, and notation is made where needed.  Often there are very similar badges available.

The.Bajman on eBay has most of the easy to find badges as well as some of the patches.  Andy Davies also recommends the-ton-up.com but says they sell out quickly.   If you're searching on eBay remember to look on the UK site as well (http://ebay.co.uk) and search for "badge" instead of "pin".


Badge: Hell's Angels
Quantity: 1
Placement: Middle of left breast, towards the sleeve.
Procurement: Not too difficult, but if you're looking on eBay the auctions are often taken down.  Make a note of the seller's name so you can contact them if that happens.


Badge: Fulham Anglers Club
Quantity: 1
Placement: Lower-middle of left breast.
Procurement: Difficult. Replicas available.
Photo: Jeff Baker  


Badge: The Jolly Rogers
Quantity: 1
Placement: Middle left breast, about an inch below the collar
Procurement: Harder to find correct 3/4" size
Photo: Brandon 


Badge: Wimbledon Speedway 1972
Quantity: 1
Placement: Left Shoulder.
Procurement: A bit difficult, but the 1973 badge is nearly identical and much easier to find.  


Badge: Here For The Beer
Quantity: 1
Placement: Upper right side.
Procurement: Easy.

Frank's Floorshow Corset (Research)

Frank's flooshow corset is red satin, and presumably lined in white.  In fact, it's very similar to his corset from the Belasco (pictured on the Anal Retentive Costume site) that you can't go wrong using it as a reference.

It's satin and laces up the front about 2/3 the way through 8 holes on each side with black lacing.

There is a ruffle across the top front, but it diminishes to nothing on the sides.  There is boning on either side of the eyelets, then the boning channels become slanted.  Again, I would use Ruth's Belasco corset for reference - it's probably the same.  The bottom has ruffling all the way around, in addition to some black (tattered?) lace trim.

There are swags of red beads across the top front (be sure to secure each swag individually).    The sequins are clustered more heavily around the center top and bottom, but continue to be dispersed over the rest of the corset.

Like the other's floorshow corsets, it probably closes up the back with hook & eyes, though a zipper would be better for quick-changing.

He has 4 red crinkled garter straps, and the satin on them seems to be similar to the trim used in the ruffles along the top and bottom.

My personal conspiracy theory?   I think the Belasco corset could be the same corset from the film with minor modifications. It seems silly to me that after wearing it on set in December of 1974 Sue would make an identical one for the same actor to wear on Broadway 12 weeks later.  Pay special attention to the beaded swag and boning channels.  Identical.  Besides, we already know Sue has recycled pieces from other productions (re: The Maids).  Or is the film corset otherwise accounted for?


Hand Embroidered Frank Patches (Tutorial)

This tutorial was submitted by Chris Froehler.  I think his results are amazing and it's a very affordable way to make your Frank costume stand out!

Materials:
   Felt
   Patience
   A Pen
   Fusible Interfacing
   Regular Thread
   Sulky Holoshimmer Thread
   Patience
   An Embroidey Hoop
   Sewing Needles
   And Patience..

Begin by finding, or taking a picture of the patch you would like to reproduce.. I'll be making a Hell's Angels patch. You'll need to resize it, and create a mirror image of it to trace onto your iron on interfacing.  (Be sure to trace the image before applying the interfacing to the felt.)

After you have applied the interfacing, place the material in the embroidery hoop. Being sure to get all of the slack out of the material.

Now we come to the part some of you might find intimidating.. But don't! :) It's a lot easier than you might think. You'll want to begin working with the interfacing facing you, so you have the traced image to use as a reference. Start by passing the needle through the felt on one of the lines of your sketch, and bring it back through on another. It's as easy as working with a coloring book! Make several parallel passes keeping your stitches about 1/8" apart until you have the body of the image finished, and turn the hoop over. 
You should now have a rough image to use as a guide. 

Using the same technique, but now using your stitches, and a photo of the patch as a reference, begin to add stitches between the ones from the first pass.  Once that is done, repeat the process until you have finished working with that color thread and move onto the next one! 
If you have any questions, don't hesitate to ask!  Be sure to find me on Facebook and share your projects with me. :)

Tips on working with the Sulky metallic, and Holoshimmer thread...

This "thread" is actually a very thin, ribbon-like strip of polyester film.  When threading a needle (I like to double up when using this thread) be sure to keep the film flat. If it gets twisted, it doesn't reflect the light very well. After passing the thread through the eye of the needle, hold the needle in one hand. With your thumb and fore-finger, pinch the thread and slide down the length to remove any twists and turns that might have occurred while drawing the thread off of the spool.. Tie the thread 2 or 3 times to make a knot large enough to prevent it from being pulled straight through the fabric. Pass the needle through the fabric. When you pass the needle back through, keep your finger or thumb under the stitch, so you can be sure the thread lays flat against the fabric for optimal reflection. 

Frank's Shoes (Research)


These are the best screen captures I currently have of Frank's Sweet T heels.  Black glitter on the platform and upper, white glitter and rhinestones on the heel (I only see clear rhinestones on the heel, but I'll keep looking).  There are also black rhinestones on the vamp.  There is no glitter on the ankle straps.  Rhinestoned buckles.  The heels are chunky, but straight (good luck!)

His shoes in the creation scene are nearly identical except they are solid black with glitter and have a rectangular buckle (p. 137 of the Mick Rock book).

Frank's Shoes (Tutorial)

Finding the right shoe
The chunk heel and platform are the most important features when searching for a suitable shoe.  The rest can be modified.  Color doesn't matter; focus on shape. Pleaser has a lot of shoes and frequently runs in large sizes, check out Snaz75.com for a huge selection.  Several versions of their "Dolly" shoe can be modified quite easily.

Cutting the toe open (if needed)
Neither leather nor pleather will fray.  Carefully cut out the toe area with a blade.  Straps can also be moved if needed, but it might be better to have a shoe repair shop stitch that down for you.  Since women's feet are typically narrower than men's, you may also need to install an elastic gusset on the vamp like Tim's.

Painting the shoe
The sole should be black; paint if necessary or your finished shoe will look weird.  Paint the outside heel area white (use tape to protect the shoe upper, sole and the heel tip).  Spray paint is easiest.  The lining of the shoe is silver.

Adding glitter
I prefer Super-77 spray glue by 3m, but if you're going to spray you need to conceal the other areas really well with tape, etc.   I also recommend covering your work area with a paper grocery bag to catch the excess glitter.  When you sprinkle the glitter on the glued area, press the glitter in firmly.  Tap the shoe on the table/counter to get the excess off.  I did the black areas first, then very carefully did the white heels.  The straps do not have glitter on them.

Shellac
Cover the shoes with multiple thin layers of a clear coat.  This will minimize any further glitter shedding.  The key word here is thin.  If you spray too many layers too quickly, or too thickly, it will turn yellow and dull and pretty much ruin everything you've done.

Adding rhinestones
Use e6000 or any jewel-tack glue to apply the clear rhinestones to the heel.

Buckle
If you're lucky to find one on other shoes you've got it made.  I haven't even had much luck on eBay or Etsy.  You can at least paint the existing buckles silver (if they aren't already) and glue some tiny rhinestones on the top bar until something better comes along.

Heel covers
I've never experimented with heel covers (to consolidate the shoe change between Sweet T and the Lab Scene), but I've heard of some pretty clever solutions that seem to work well - and please feel free to add any tips in the comment section!

DIY Motorcycle Badges


Inspired by Patti who made me some awesome jewelry, I just had to play with the stuff.  This is not the Shrinky Dinks your parents played with!  You can print your own designs off an ink-jet printer - and here's the best part; this shit is hard to break.  It shrinks to 1/3 it's size, but becomes 9 times thicker.

So here's my first go - the 1971 Motorcycle Shows 59 Club badge.  I've never come across it on eBay so I'm gonna say it's kinda rare.  I couldn't get a great photo of one, so I downloaded a photo off the internet and cleaned it up in Photoshop.  The font isn't a perfect match, but you can be pickier if you want.  My image is 2.25" across - and you need to lighten the image about 50% before printing.  It gets darker when it shrinks.  A lot darker.  Just follow the instructions and you'll be fine.

I had the best results with the printed side down, between two sheets of brown-bag paper.  Less curling and it didn't affect the image.  It took about 3 minutes in a toaster oven (yeah, I bought one just for this).

Here's what makes the biggest difference:  embossing powder.  It adds another layer of clear, shiny plastic.  Once your Shrinky Dink is done shrinking, it's done.  While it's still warm you can manipulate it a little - flatten it more if you need.  But if you put it back in the oven it's not going to shrink any further.

So once it's cooled off sprinkle the embossing powder (actually, it's tiny little plastic beads) all over it.  Stick it back in the oven and just keep an eye on it.  The beads will melt into one solid clear coat - maybe 30 seconds?

You can apply any pin-back style you like with some e-6000.  I know you're thinking "but it's plastic, it's going to break" - but I wasn't able to break it, and it took my friend's husband some considerable effort.  It'll look great from stage - and it's a great place-holder if you want to keep looking for an original.

Mao Badge


I had a handful of Mao badges made.  If there's interest, I will order more.  Ultimately, I'm hoping to have other badges reproduced.  The reproductions won't be valuable like the originals, but I think people will feel a lot more comfortable wearing them on stage.

Mao Badge eBay listing (8/17/2012)

The Chairman Mao badge doesn't actually appear in the film, though you can see it on Frank's jacket in the Mick Rock photos.  I suspect it was removed because, as a large, flat object, it reflected the set lighting.  That's my best guess.  I doubt there were any political issues since he has a Nazi swastika on his sleeve.

Still, it's a nice piece of Rocky trivia and something unique for the Frank who has "everything".  Especially if you're looking to fill up your jacket.

Chairman Mao Zedung was a controversial 20th century figure. If you've ever wondered more about Warhol's piece, I found this on chinadaily.com.cn -

"Andy Warhol was in love with fame," said Gorvy. "At the moment in history, 1971-72, it was the reopening of China to the West. China was creating new relations with America. Nixon had gone over to China so Chairman Mao's image was everywhere and Warhol captured that. He understood ... that it was famous not just for that moment but famous forever." 
The auction house said "Mao" constituted Warhol's first political portrait, successfully paving the way for a number of other political portraits and subjects including "Lenin" and "Hammer and Sickle." 
"He chose Mao because he really was the most famous person in the world at that particular moment," said Gorvy.

Frank's Coat of Arms Badge

I know this is a really tiny detail, but I've invested a lot of time trying to figure it out so I'm going to share what I have so far.


The blue chevron is flanked by red chevrons.  The charges look like a calligraphic "S" in the field area and 3 English rose charges on the chevron.  It reads "Adoremus Dominum" across the bottom, but I can't make out the top at all.
Also, here are some of the symbols explained:
  Adoremus Dominum - "Let us adore God"
  Blue - Truth and loyalty
  Chevron - Protection; Builders or others who have accomplished work of faithful service
  Letter (S) - May represent great battles or tournaments beginning with that letter<
  Red - Warrior or martyr; Military strength and magnanimity
  Rose -  Mark of the seventh son
  Silver -  Peace and sincerity