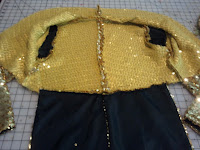
 You can probably apply this method to most commercial tail coat patterns (the Costume kind). I cut a complete 2nd set of all pattern pieces for the lining whether the pattern calls for it or not. Lining your tail coat will extend its life. I only apply the black sequin fabric to half of the front lining pieces - no need to add bulk all the way to the side seams.
 I bag-line my sleeves and tails separately, leaving the tops open to turn out. After you've turned them right side out you can attach the lining and sequin fabric together with a running stitch and there-after treat them as one-piece when setting them into the torso.
I construct the torsos separately - the sequin fabric and the lining. Then I set the sleeves into the sequin torso, and attach the tails to the back. At this point it looks like a tail coat sans lining. You could try it on and adjust accordingly at this point.

With the tail coat laying face-up, I fold the sleeves and tails up onto the torso so all the torso edges are clearly exposed. With right sides together I lay the lining torso down. Carefully lining up seams and edges, pin together then sew the entire perimeter. You are effectively bag-lining the whole tail coat. Trim your corners and curves accordingly. Grade your seam allowance if you need. Then pull the jacket right-side out through on of the lining's arm-holes. Finger-press around seams. If you must use an iron - use a low setting and a press cloth and do it quickly (never let an iron touch the sequins directly).
You can close up the lining's arm holes by hand with a quick whip-stitch. Apply your buttons to the outside and you're done!
Photos of my finished tail coat are in this entry.

